
To have a shower or a bathtub? The one hill our relationship almost died on, so in the end we went with both.
I am excited to announce the next fully finished space in our renovated forever home after the pantry: the bathroom! It was fully functional about a year ago already, but it took us until recently to completely finish it with all the cupboards, details and decoration, because other things were a priority. I am pretty sure that the bathroom was the most complex room of our home renovation and it took the longest, because unlike everywhere else, where we kept and reused or upcycled at least some of the existing elements, we completely tore it down and built it back up from scratch.
The bathroom now has a completely different layout and new plumbing and electrical installations, although we were somewhat limited by the original position of the main toilet drain pipe for waste water and the chimney, which is now bricked up inside our shower. We also had to install the gas boiler in the bathroom, but I think we managed to place and hide it quite well.
Before


My partner’s sister Manca is an architect and she helped us plan out the layout of the whole flat, which was extremely useful, because we hit the first major bump of the home renovation very soon after the start. She asked us whether we wanted to have a shower or a bathtub and I am not joking when I tell you that this was a hill we were both willing to die on and the closest we came to breaking up during the home renovation process. It may sound silly, but I grew up with a bathtub and consider bubble baths a major highlight of my life and an irreplaceable part of my relaxation routine, while my partner absolutely hates taking baths and has always dreamed of having a walk-in shower so that he won’t have to high-step over the edge of the tub every time he takes a shower.
Even though bathtubs are clearly superior and allow you to both shower and bathe in one, he would not relent and neither of us were willing to back down. The bathroom is not really large enough to have both a decent walk-in shower and a full-size bathtub, but Manca eventually came up with the idea of a space-saving corner bathtub. Since I am short, it is the perfect size for me and we were both able to get what we wanted – phew. He even made me a fancy bath tray for my birthday last year.


The bathroom renovation was a huge DIY job with some very questionable, if not downright dumb scheduling decisions, as we had decided on a rather complex layout and were learning everything on the go. There were several things we initially failed to consider and had to adapt to later when we realised it. The sequence of tasks was also not planned in advance very well, but rather governed by the amount of time we had available on top of our jobs and other activities. The big, time consuming tasks were mostly done during the weekends or vacation days, but we tried to fit the smaller tasks into the afternoons after our work, so we ended up doing some things ahead of the ones that should have logically been first. Sometimes that turned out to result in more trouble than it was worth, but we managed alright in the end.
First we completely demolished the old bathroom and stripped it to the ground, a.k.a. the arch below. It was a difficult time because my partner had a freshly damaged nerve in his arm and was unable to do much impact hammering, so I had to learn how and others came to help us as well, because there was a lot of smashing and digging to do and the old tile glue turned out to be incredibly resilient and annoying. After the bathroom was fully stripped and dug out as low as we could go, we called in the plumbers for new water, sewage and central heating installations. At the same time and definitely too early, we also got the gas boiler installed in the corner of our bathroom, because we had to disconnect and separate the central heating circuit, which used to run through both floors of the house, into two separate heating circuits for our flat and the one downstairs. They also had to lay out a whole new network of gas pipes across the whole house, so the only way to do all this without majorly inconveniencing my partner’s parents downstairs was to do it all at once and replace their old water heater with a new gas boiler as well. Due to cost and time constraints, we then got our gas boiler installed then too and had to keep it covered during the rest of the dirty works for about half a year.
Next up were the walls and the floor. I’ll never forget what an absurd amount of cement and gravel (about a cubic metre) we carried up the stairs in bags and buckets to mix into concrete so that we could fill in the floor around the installations. I also did not enjoy trying to hand-straighten out the walls with lime and cement plaster, first with the rough and then the fine plaster, because no matter what I did they were not flat over the whole length. Luckily my partner was better at it and our bathroom walls are now passably straight, which is an important requirement for laying tiles. He also closed up and insulated the old chimney and built a siporex block wall in the shower area, complete with a fancy shower niche, which was something we both fell in love with on Pinterest. Of course we couldn’t just find a pre-made niche, so he had to DIY that with some sort of hard foam plates as well (you can find lots of ideas online and we mostly learned from YouTube).
DURING


Then came the hydroinsulation coating and the installation of the shower pan, because we wanted it to be in line with the floor for a proper walk-in shower. Walk-in showers are usually made with a special type of linear drain and tiled with the same floor tiles as the rest of the bathroom for a uniform look, but the tiles need to be laid at about 2° angle to ensure that the water will flow into the drain properly. We had heard bad things about linear drain blockages and the difficulty of installing them correctly + it was my partner’s first time laying tiles, so we were a bit skeptical about doing it. Since we did not want to pay extra for a plumber to do it, we decide to get a shower pan, which is like a flat shower tub on the floor with a large regular drain in the middle that we had seen at a friend’s house. We found a gorgeous cream coloured one made of some kind of synthetic stone with a rough texture for grip and I think we chose very well. The installation was relatively easy and we poured in some self-leveling compound around the shower pan to achieve a uniform floor level across the whole bathroom. Self-leveling compound is a type of polymer-modified concrete, which is great for when you need a layer of just a few centimetres to flatten out the floor – yes, I learned a lot of new stuff during the renovation.
The tiles were next and my partner considers it the most hateful part of the whole home renovation. The floor tiles barely took any effort, but we had chosen very small rectangular wall tiles and even though he only laid them about 1.6 metre up the wall it took him forever and it just wouldn’t end. We also installed electrical floor heating under the tiles and two pretty stone shelves in and next to the shower niche. The grouting was a breeze in comparison and then came the corner bathtub and the ladder radiator.
We were already living there at the time without a fully functioning bathroom and had to use the one downstairs, so we installed the toilet and the bathtub tap as soon as we could, which was really inconvenient because we still had a fair amount of the dirty work to do. In between everything we were slowly working on creating a sort of wooden box construction for the bathroom ventilation system (we used a local recuperation unit) next to the window and we also still had to fill in the slanted roof space with insulation and cover it up with turqouise wooden particleboard panels, which took forever to be delivered. Once we had them, we were able to get the wall paint mixed in the exact same shade so that I could paint the walls, then all that was left was to install the rest of the elements and furniture and add the silicone sealing and decorative details.
Still during


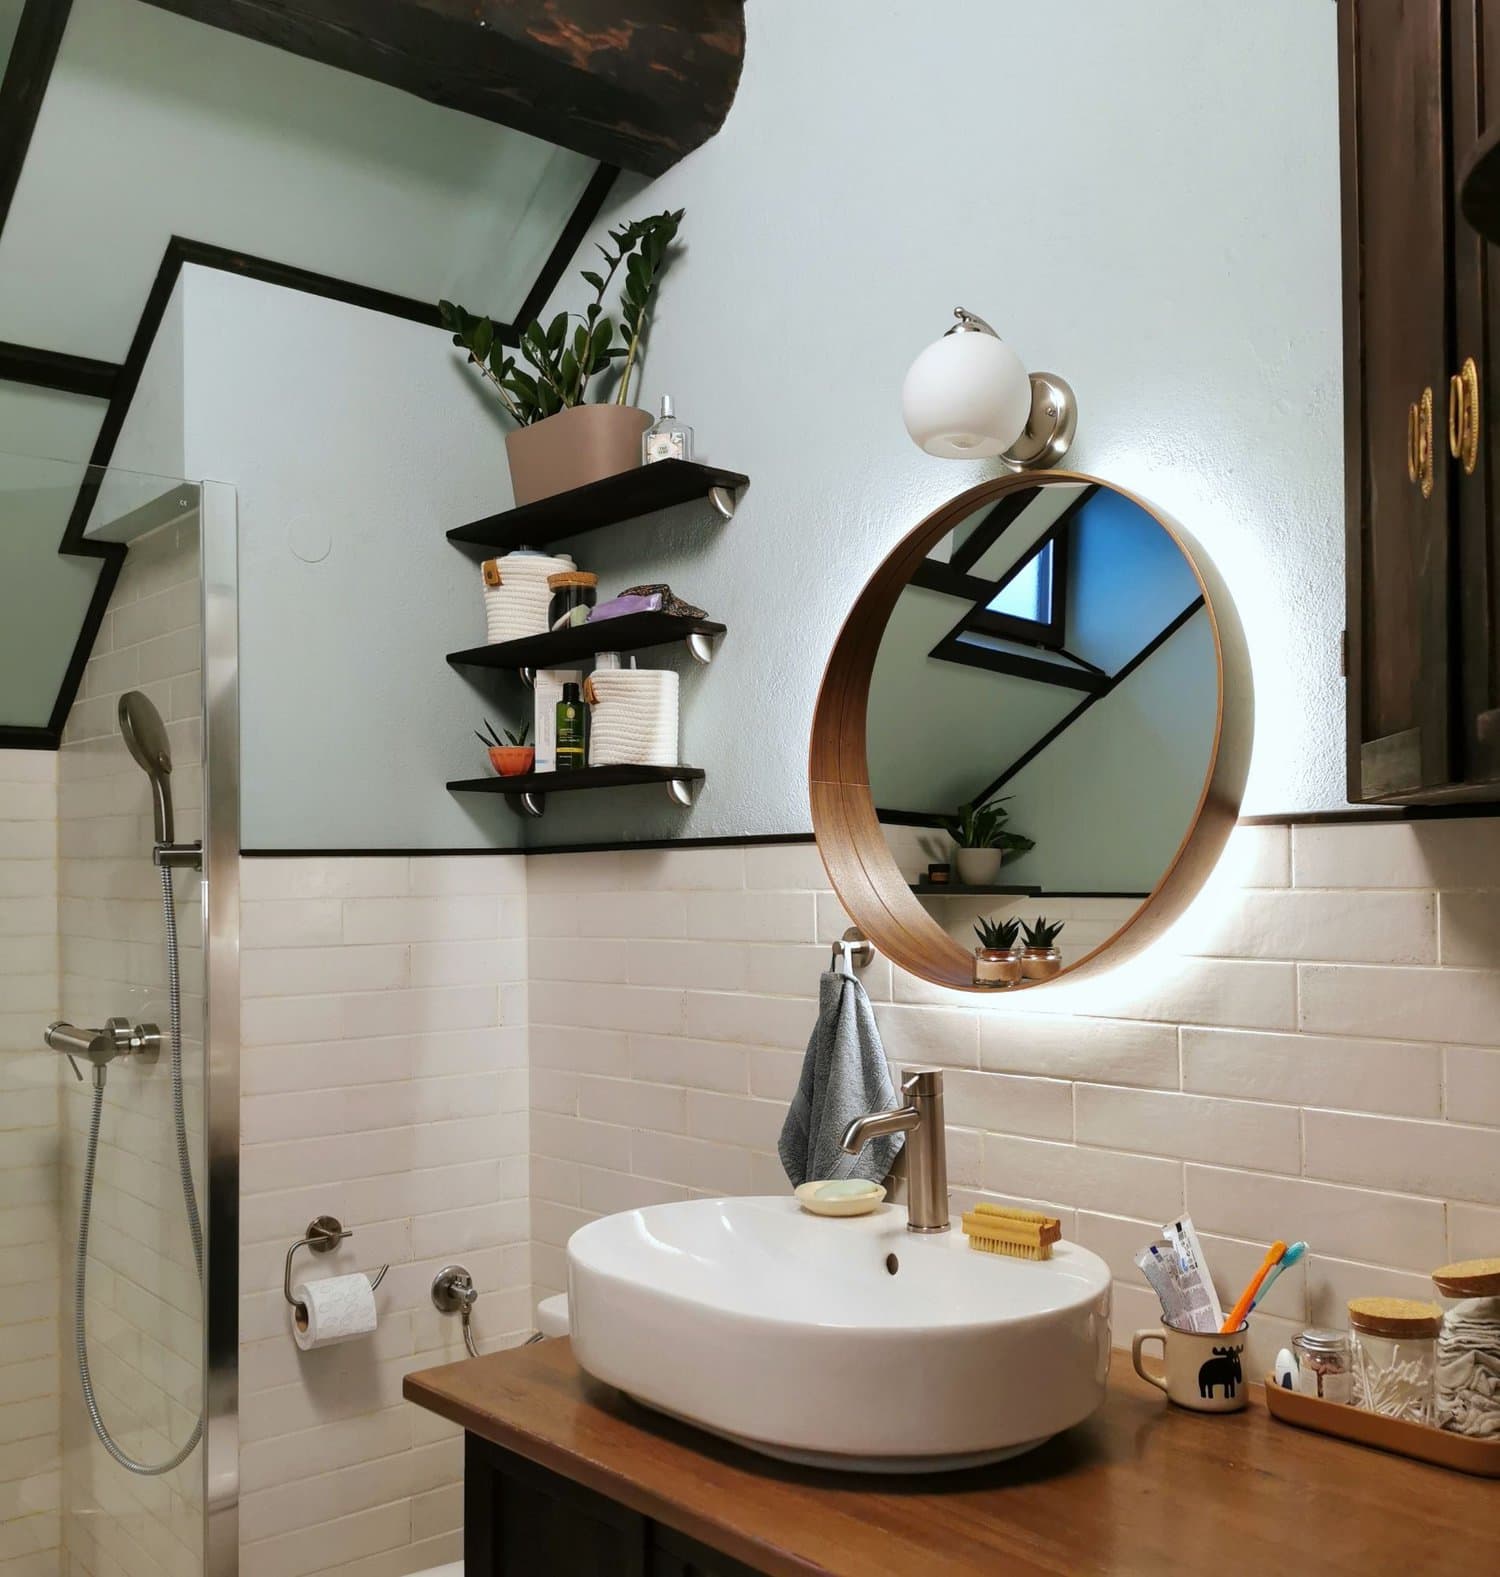
You can see the final result in the gallery below. Our initial wish was to have rectangular brick-ish sage green tiles with white walls above them, which was something we’d seen on Pinterest, but when we went tile shopping we couldn’t find any nice green or blue tiles that were not square or too expensive. We decided to invert the idea instead and bought white tiles and turqouise particleboard panels, because they also weren’t available in sage green. The floor tiles were supposed to be the same cream colour as the shower pan, which my partner was convinced they were while we were in the shop, then he was mega surprised that it was not so when we got home, but they were a bargain at 8€/square metre so we kept them. Everything ended up different than we’d initially imagined, but we love it.
The mirror came from Ikea and was one of the first furniture items we bought, because it was love at first sight. It soon became obvious that all of our friends thought the same, because several of them have the same mirror in their homes too. We later decided to continue the dark brown wooden decorative slats theme that already existed in our main living area in the bathroom as well, so we had to come up with a way to match at least one other element with our beloved mirror. We choose the sink counter, but because of poor planning it had to be thinner than what was available in the right colour in the hardware store, so my partner ended up painting a beech board in the same shade. He also made all the cupboards and shelves himself with the help of his father (they have a family furniture restoration business and a workshop right next to our house, which is the main reason we were able to DIY so much of this renovation ourselves). My father helped with the electical installations and the fancy LED backlighting in the shower niche and behind the mirror, so like I already explained in the moving-in post, it really takes a village to get something like this done. Also, I would like to specifically point out our doughnut-shaped ceiling light fixture, because it is one of my favourite things. P.S.: In case you are wondering why I didn’t take better photos or landscape oriented ones, it is because the bathroom really isn’t that big, so I had to take photos at creative angles to show you a comprehensive picture.
After


We will probably end up adding some more things, like an extra shelf or some more decorative elements if needed and I will update this post if we do, but for now it is finished and I absolutely love it. In the past year we have also managed to find a combination of bathroom plants that don’t wither and die due to the perpetually poor lighting, so my dream of having a bathroom jungle has been reasonably achieved.
I decided not to discuss the costs in these home renovation posts, because it took so long that the price of everything has long changed and I don’t feel like justifying my spendings on the Internet. However, I will say that we made a very wise decision by buying all the major bathroom and kitchen elements in bulk well in advance in 2021, because in just 6 months all the prices hiked up for at least 50% if not more in the same shop.

Share your thoughts with me